After purchasing WhatsApp Chat Help Pro, this guide will walk you through everything from installation to activation and configuration — so you can start using the plugin in just a few minutes.
1. Install the Plugin #
After downloading, you’ll find the plugin in a zip file named chat-help-pro.zip on your computer.
- Log in to your WordPress Dashboard.
- Navigate to Plugins → Add New → Upload Plugin.
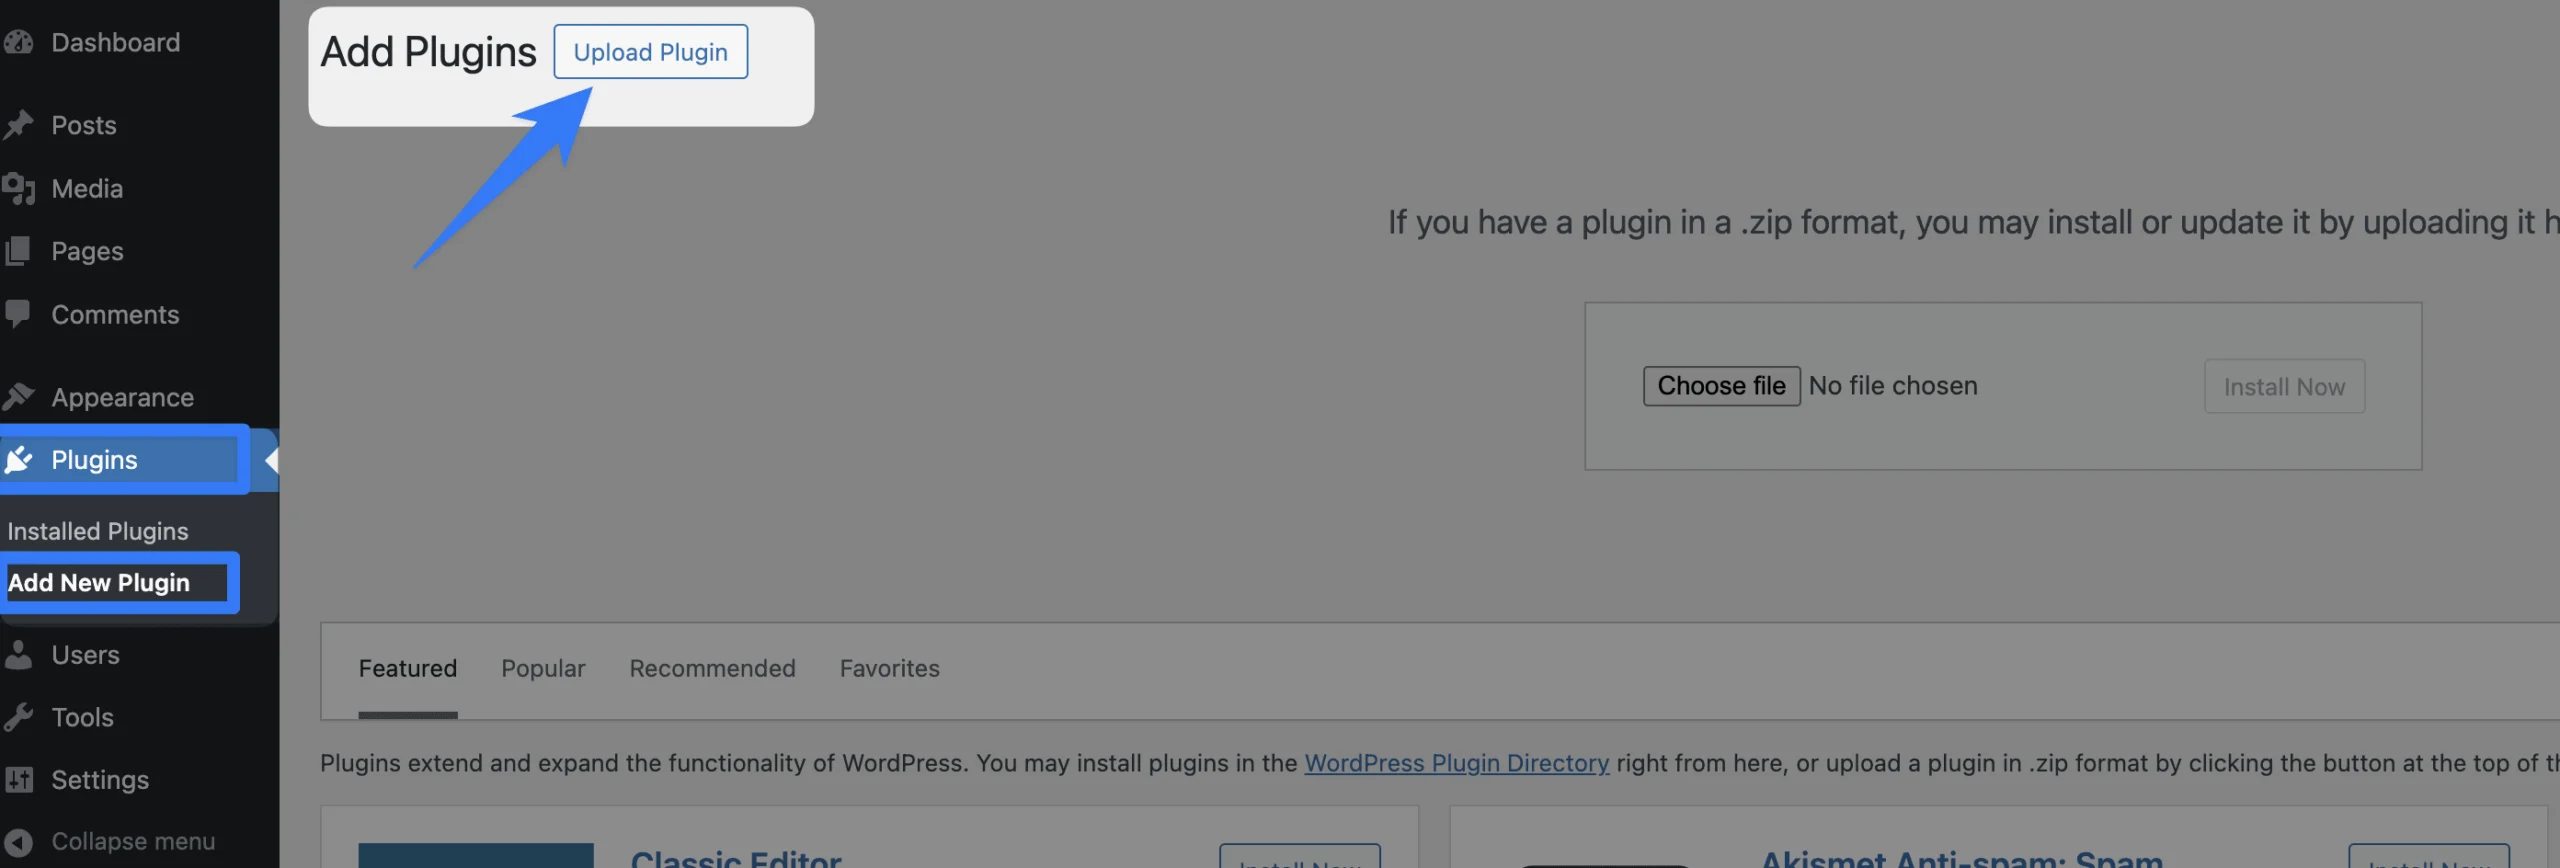
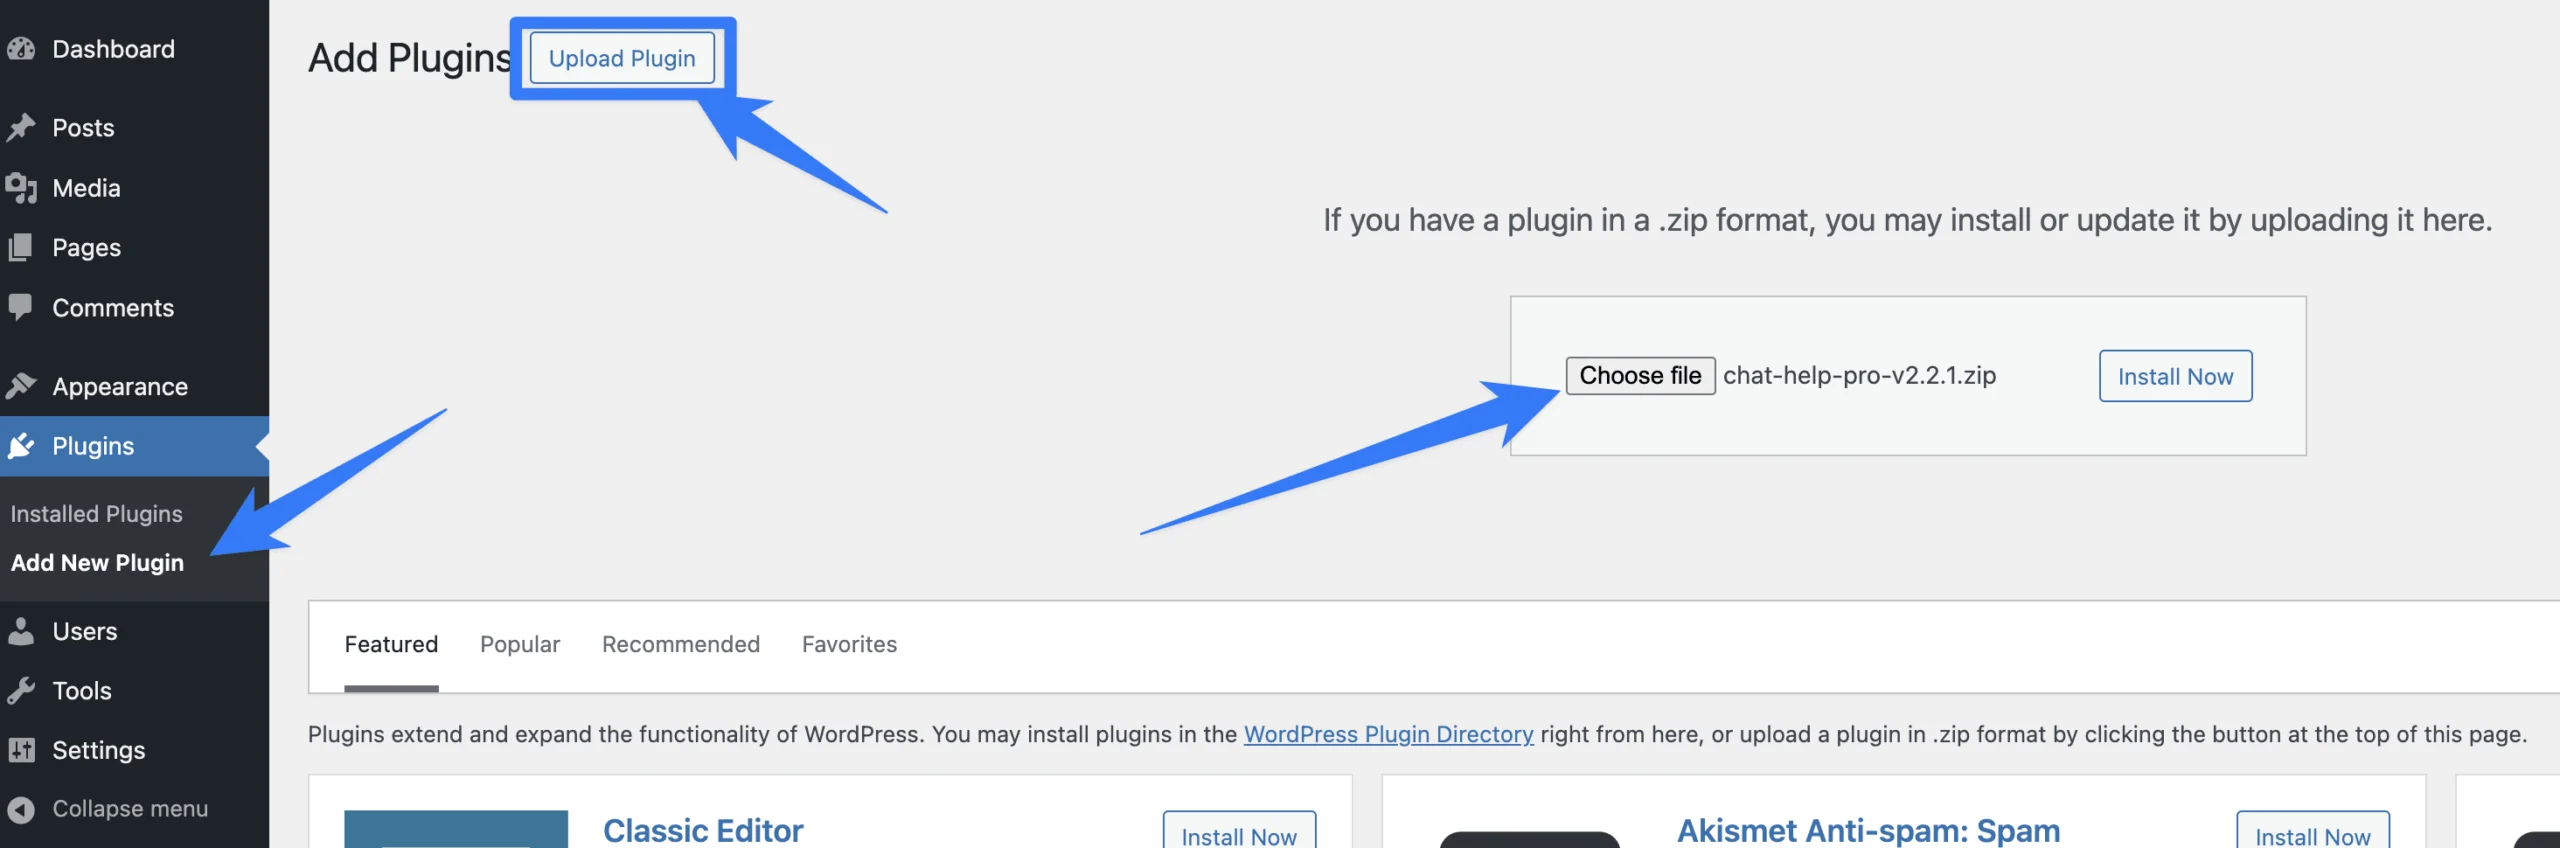
- Click the Upload Plugin button, then select the file chat-help-pro.zip from your computer.
- Click Install Now, then click Activate Plugin once the installation is complete.

2. Activate Your License Key #
After activation, you’ll be redirected to the License Activation page.
- Retrieve your license key from your ThemeAtelier Account or from your purchase email.
- Enter the license key in the activation field.
- Click Activate.
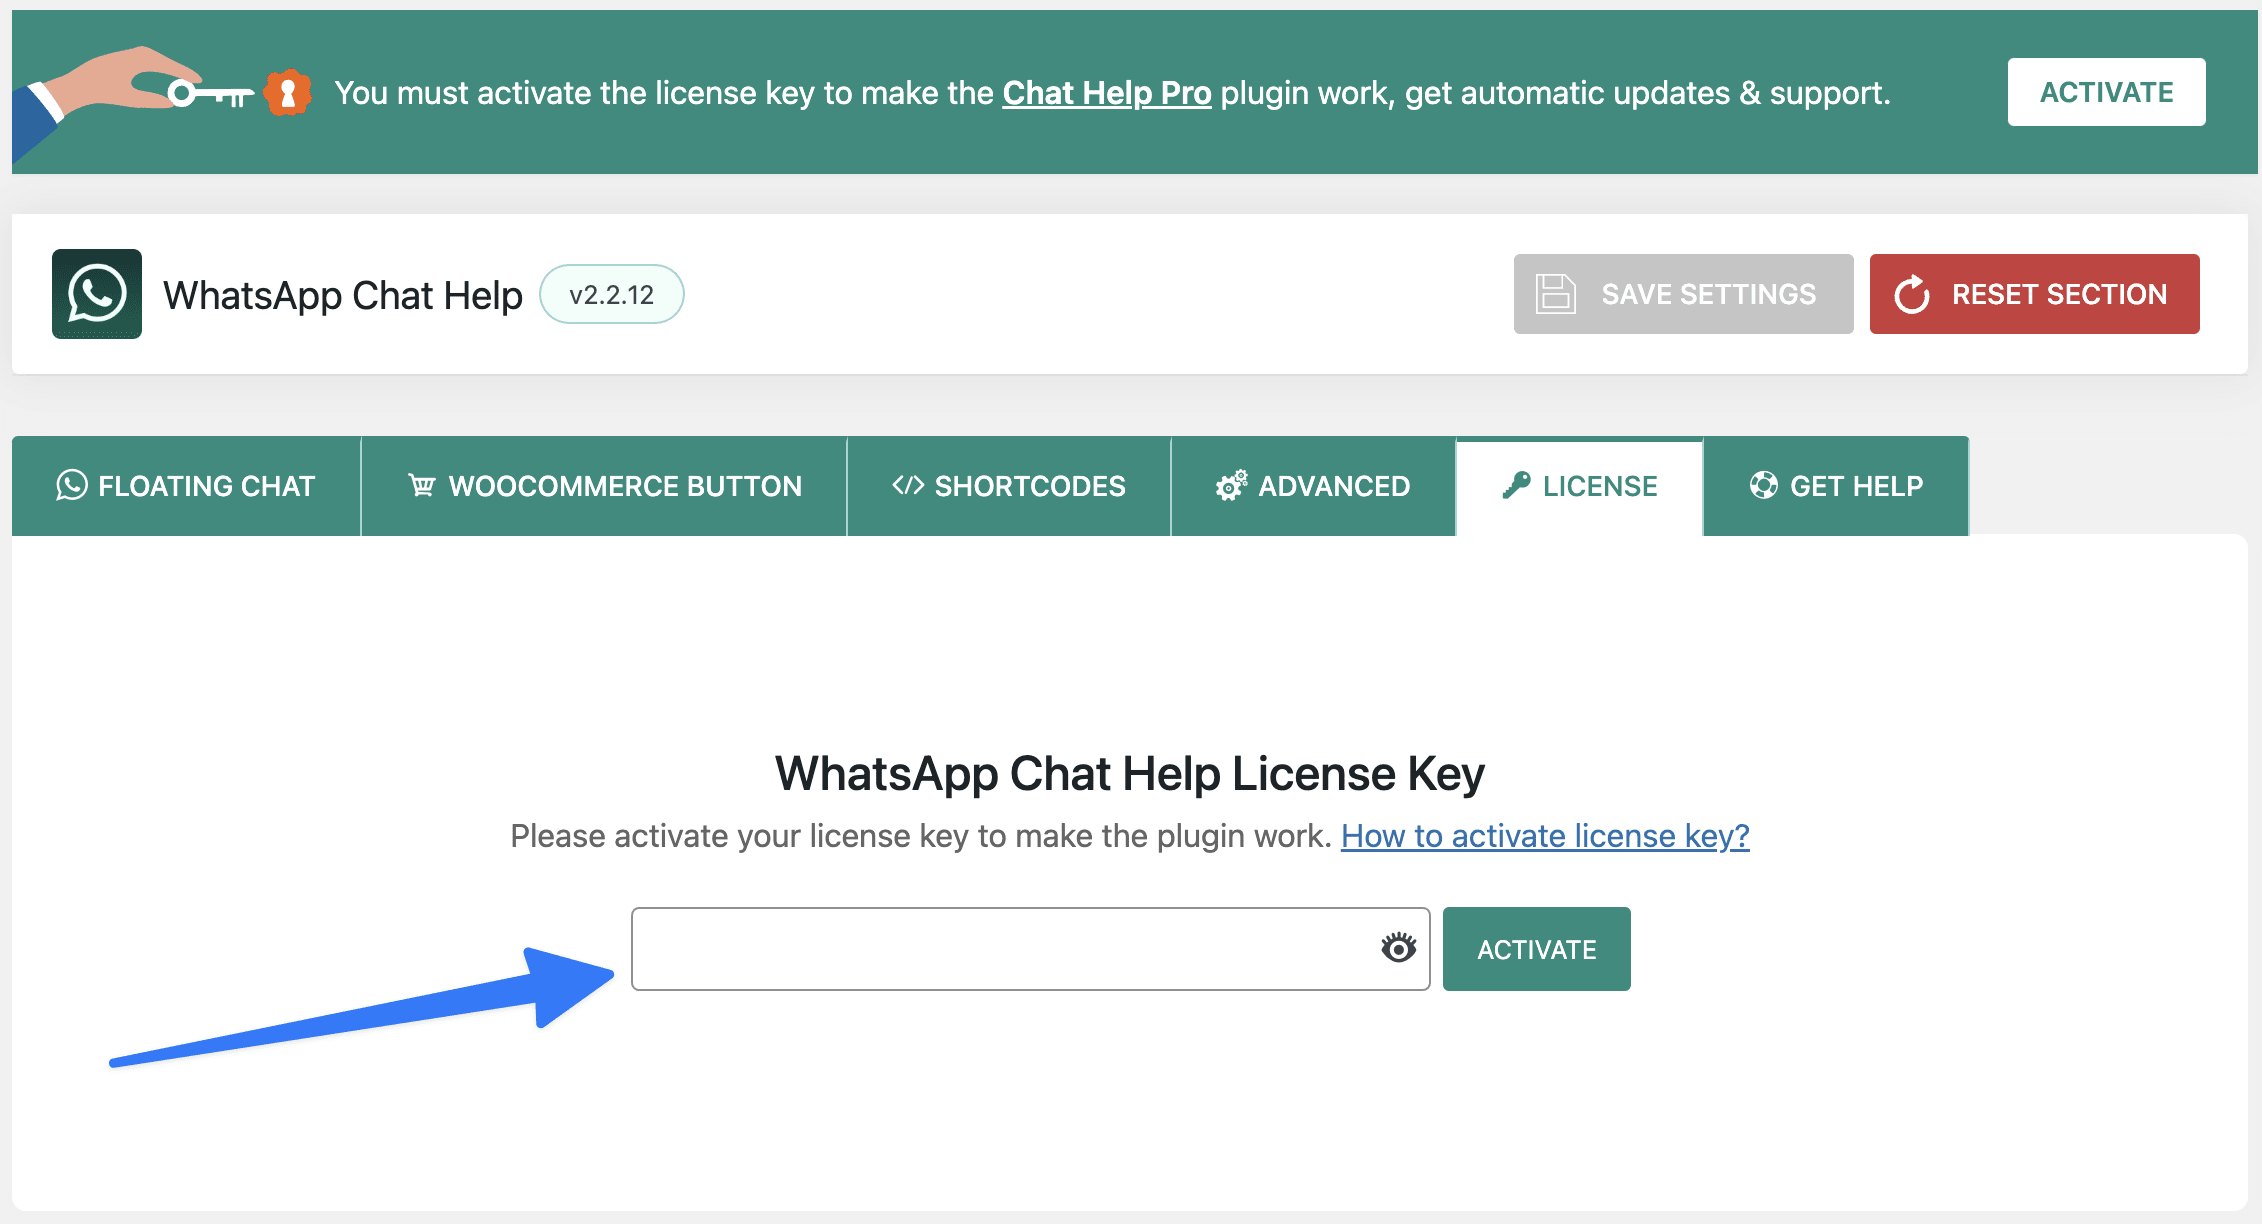
✅ Once activated, you’ll unlock all Pro features and receive automatic updates & support.
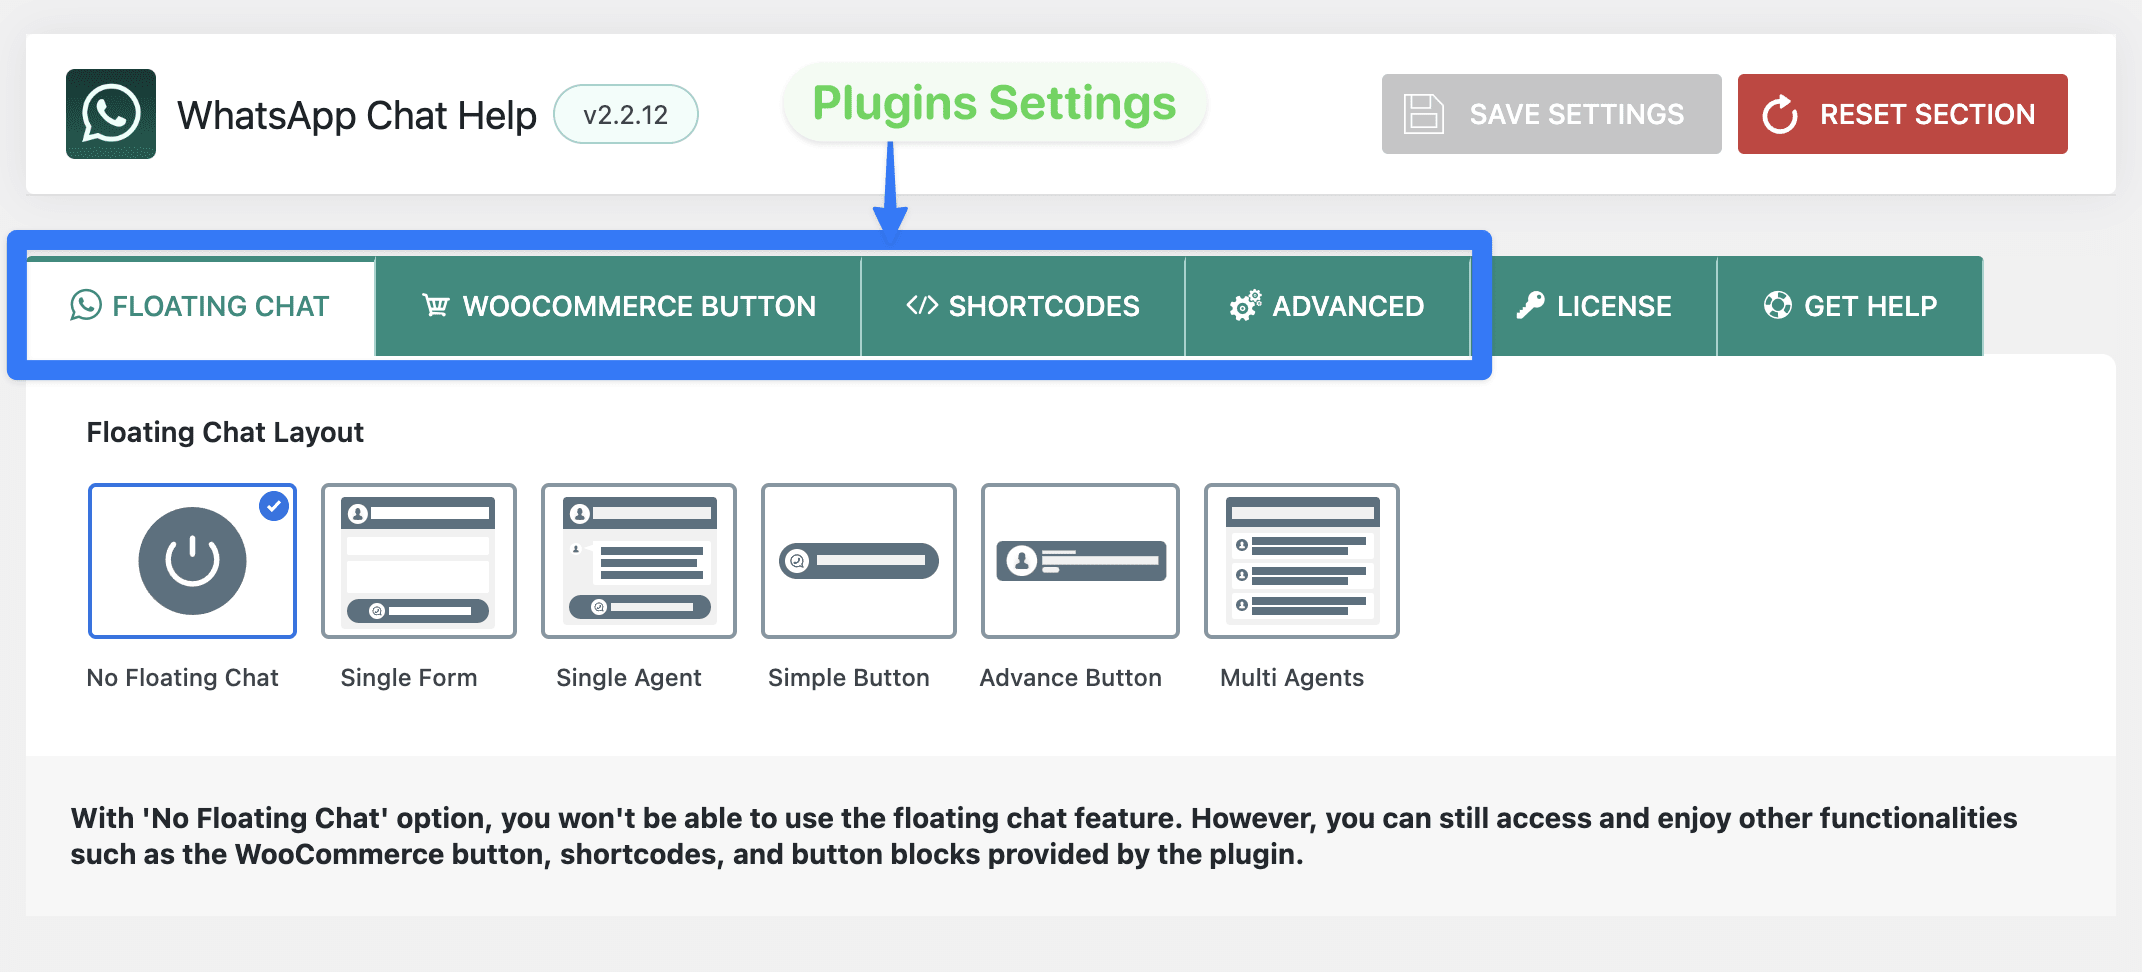
Configure WhatsApp Chat Help #
After activation, you can configure the plugin settings:
- Go to the WhatsApp Chat menu in your WordPress dashboard.
- You’ll find multiple tabs to customize your experience:
- Floating Chat – Design and manage your chat bubble.
- WooCommerce Button – Add WhatsApp buttons to product pages.
- Shortcodes – Place WhatsApp buttons anywhere with shortcodes.
- Advanced – Manage analytics, webhooks, and developer tools.
- License – Manage your license key.
- Get Help – Access Video tutorials, documentation, and support.