

The Multi-Agent Grid layout displays multiple support agents in a grid-style format inside the chat bubble. This layout is great for teams where you want to highlight several agents equally, making it easier for users to choose from multiple support representatives.
- Layout Selector – Multi-Agent Grid
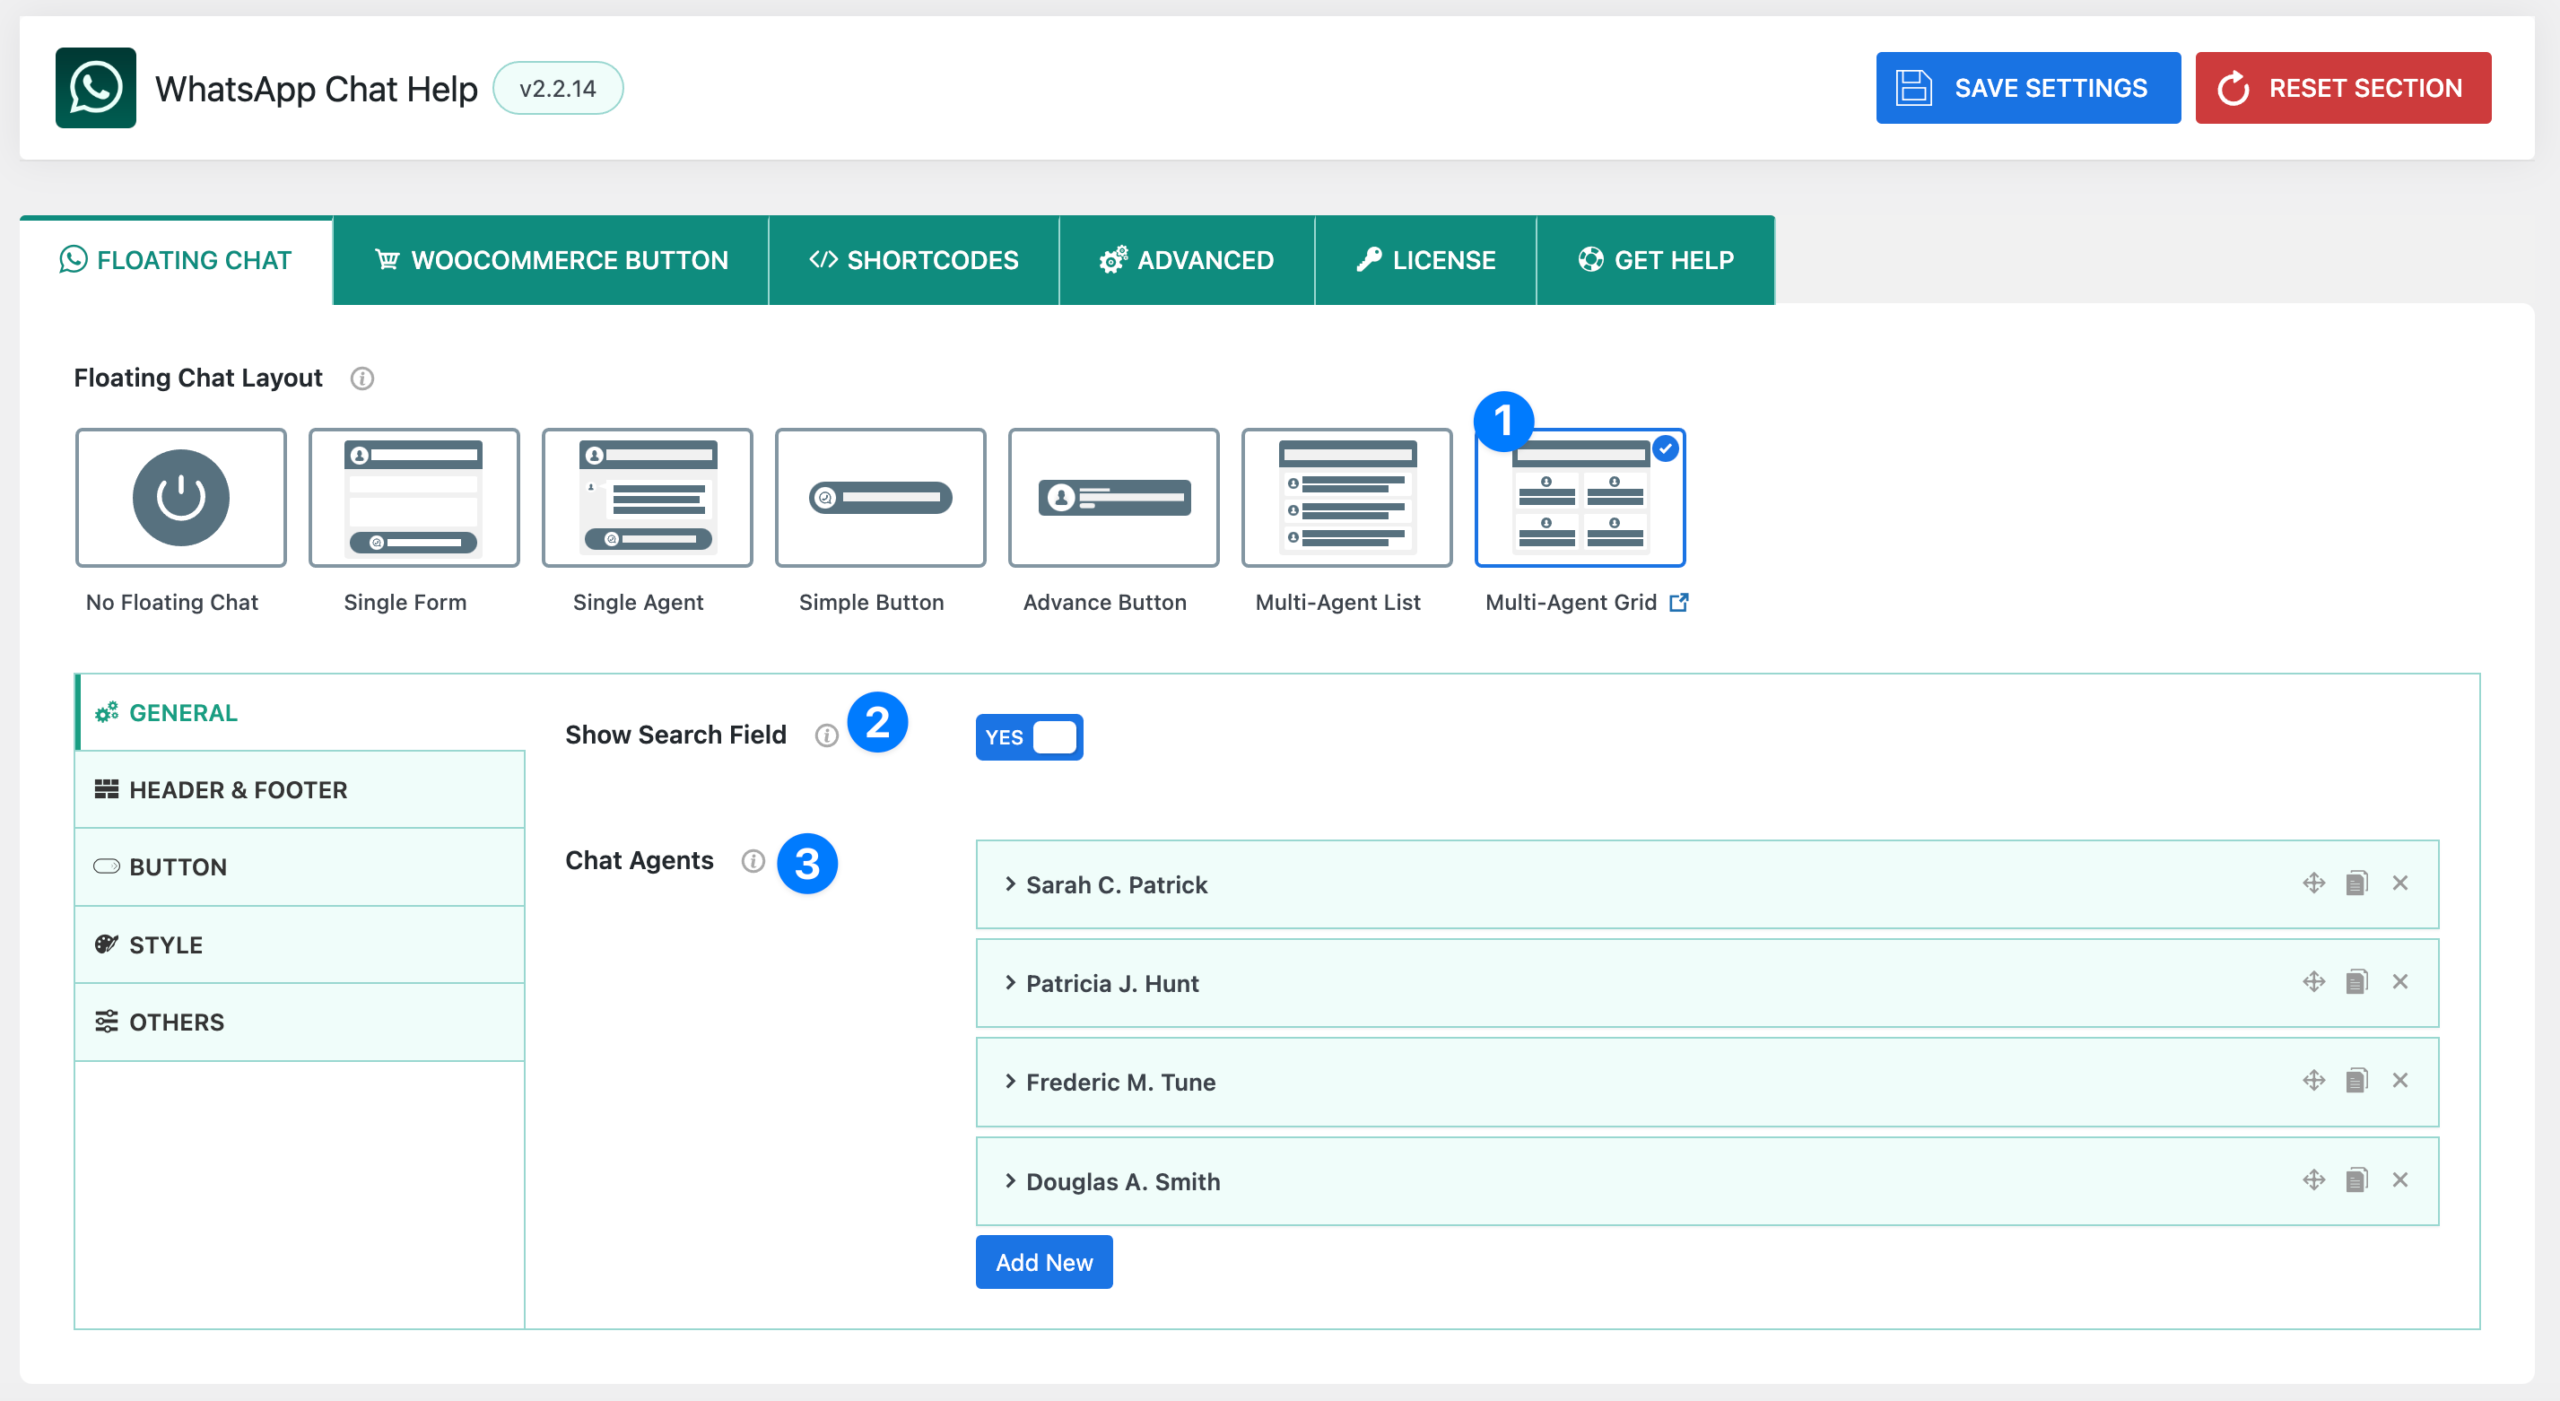
Select the Multi-Agent Grid option from the Floating Chat Layouts. This will organize agents in a grid view instead of a list, showing their names, designations, and optional photos in a structured format. - Show Search Field
- Toggle ON → Adds a search bar above the agent grid, allowing visitors to quickly locate a specific agent by typing their name.
- Toggle OFF → Hides the search field, showing only the grid of available agents.
- Chat Agents
This section allows you to add, edit, and manage multiple agents who will appear in the grid. For each agent, you can define:- Agent Name
- Agent Photo (default, custom, or none)
- Agent Designation
- WhatsApp Type (Number / Group)
- Number or Group link
- Pre-filled Message
- Timezone & Availability
- Online/Offline Texts
👉 You can add as many agents as needed by clicking Add New.
Agent Settings #
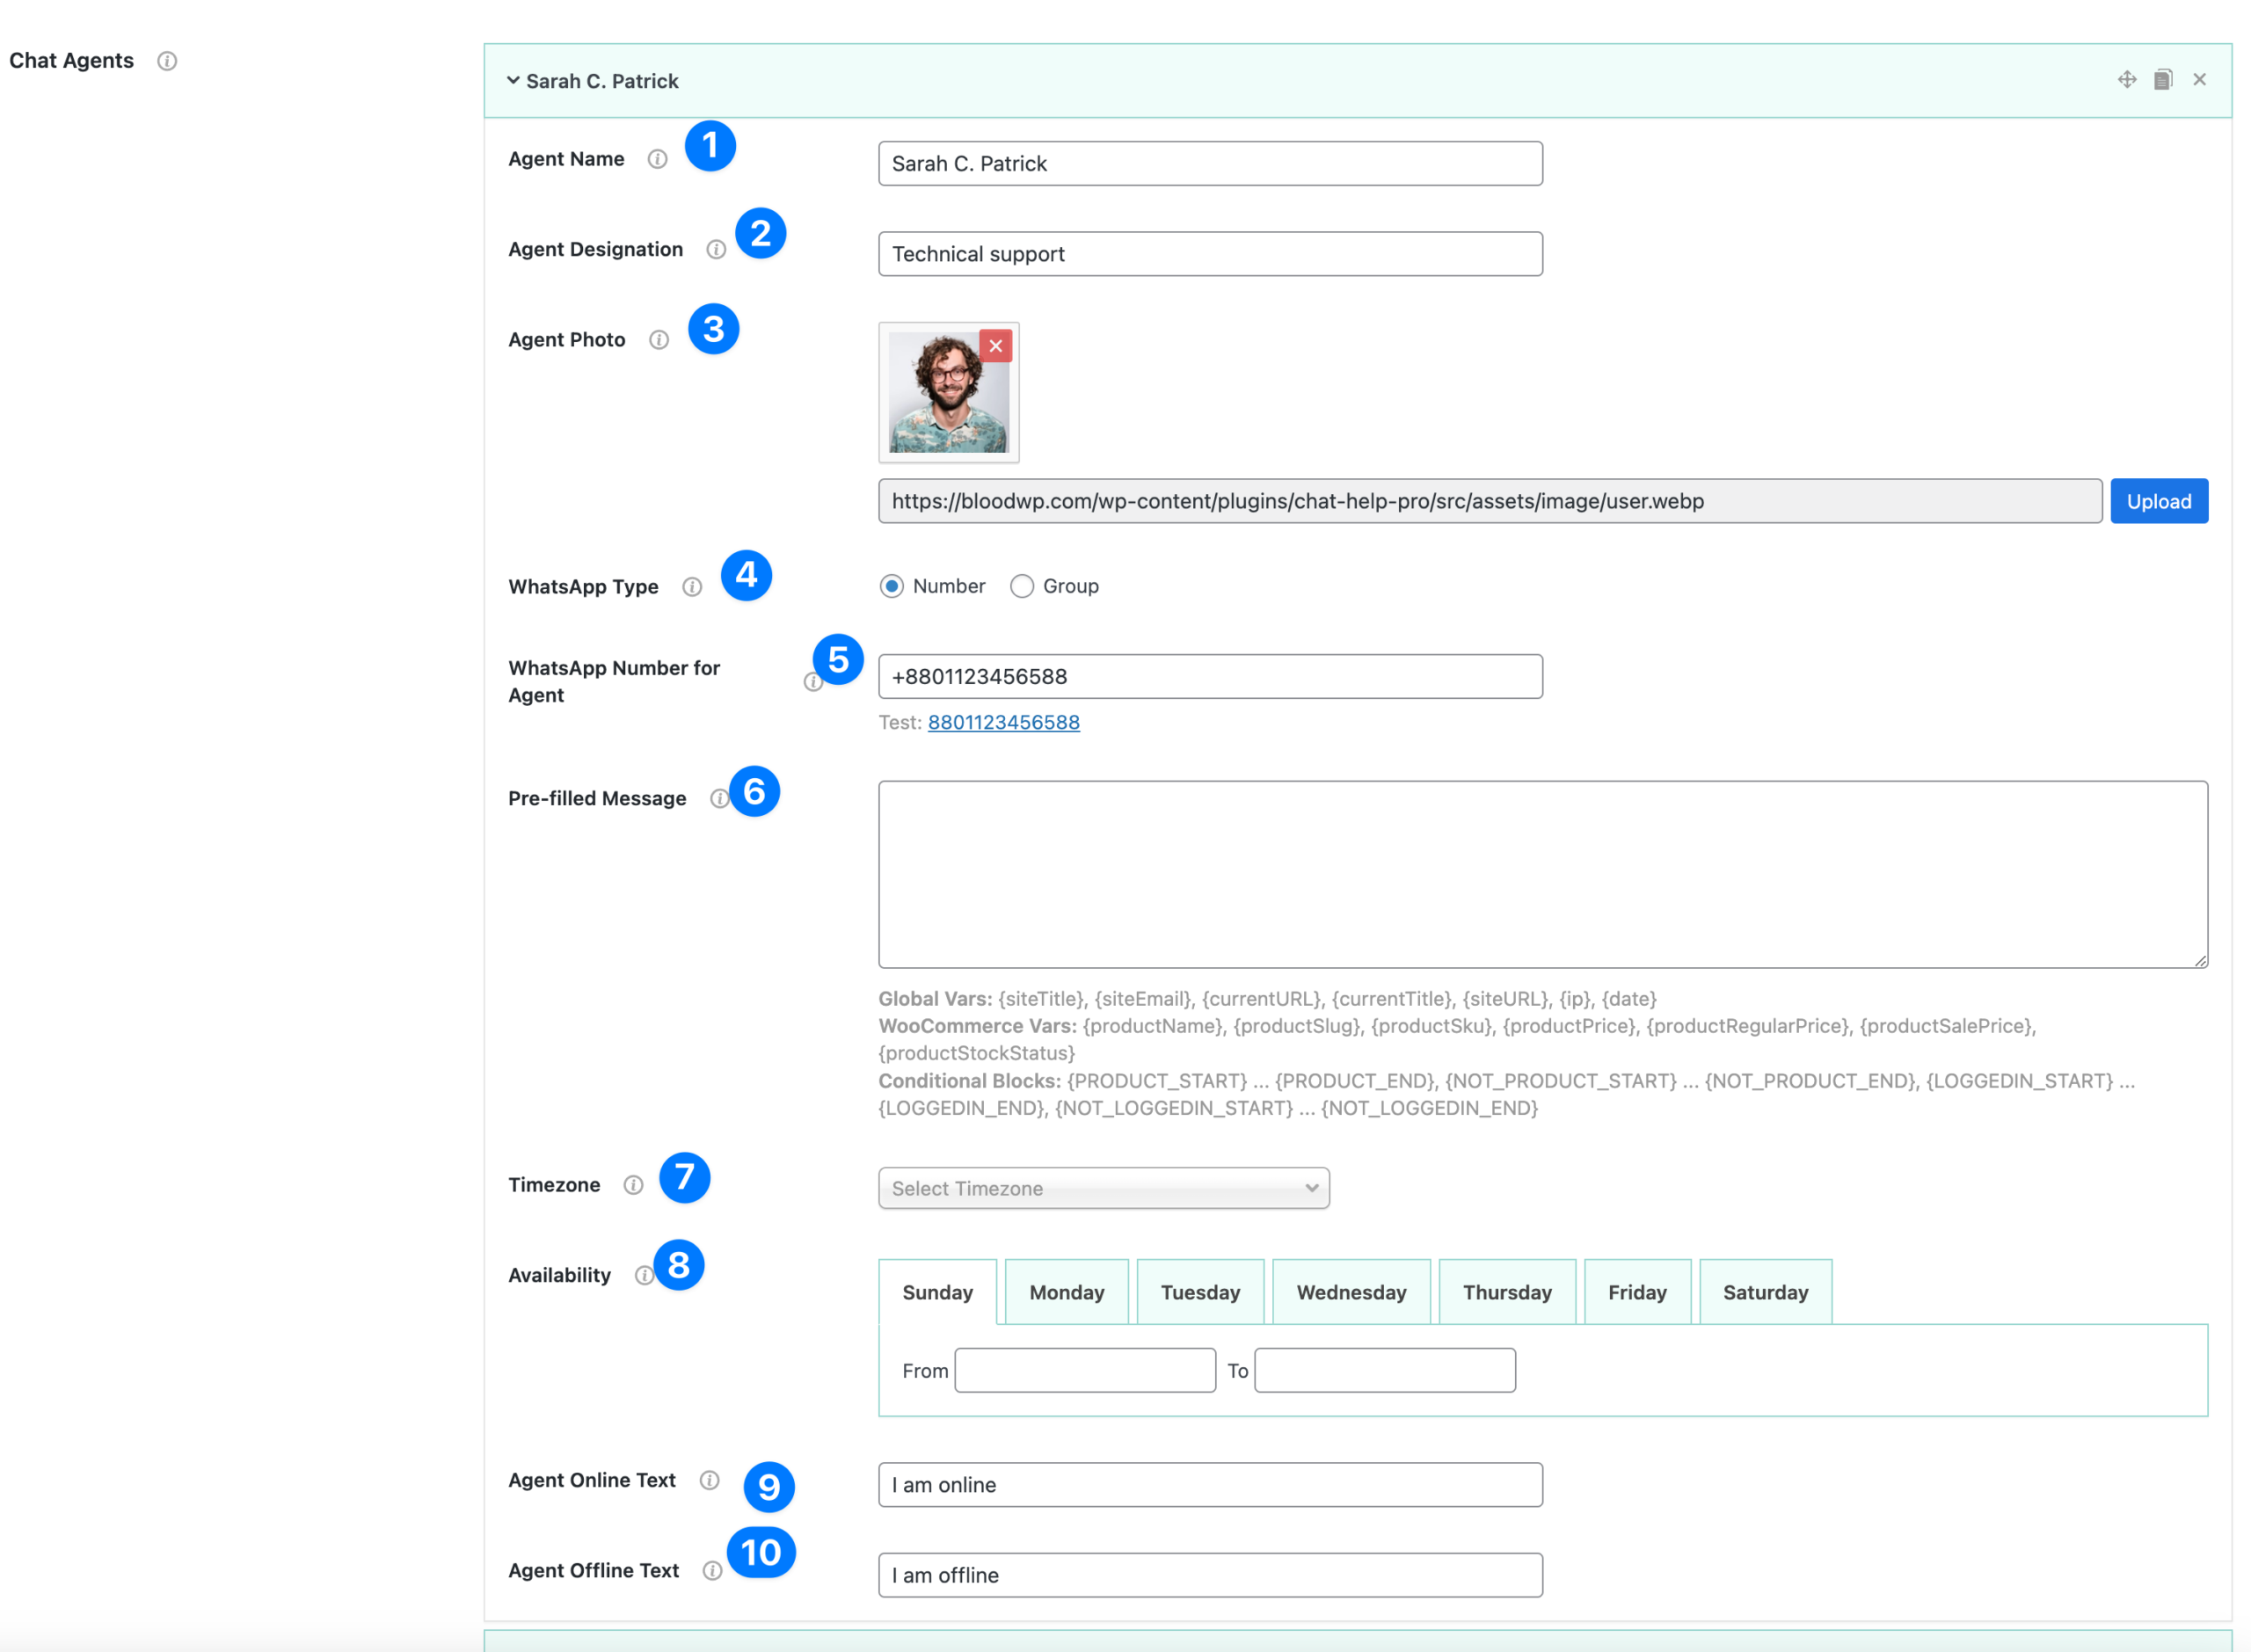
When you add or edit a chat agent, you can configure the following details. These settings allow you to personalize how each agent appears inside the chat bubble and how they connect with visitors.
- Agent Name
Enter the name of the agent. This will be shown in the agent list/grid so visitors can identify who they are chatting with. - Agent Designation
Add the agent’s role or department (e.g., Sales, Support, Technical Help). This helps users understand which agent is best to contact. - Agent Photo
Upload an image of the agent or representative. This adds a personal, friendly touch. You can use either a real photo or a custom avatar. - WhatsApp Type
Choose between:- Number → Users connect directly to an agent’s personal or business WhatsApp number.
- Group → Users are redirected to join a WhatsApp group.
- WhatsApp Number for Agent
Add the agent’s WhatsApp number in international format (e.g., +880112345678). If using Group, insert the group invite link. - Pre-filled Message
Set a custom message that will automatically appear when a user clicks on the agent’s WhatsApp button.- Example: “Hi Sarah, I need help with my recent order.”
- You can also use dynamic variables like
{siteTitle},{currentURL},{productName}for personalized messages.
- Timezone
Select the timezone for this agent. This ensures the correct availability times are displayed for visitors across different regions. - Availability
Define the agent’s working schedule by selecting days and time ranges. Visitors will see whether the agent is available or offline. - Agent Online Text
Customize the text shown when the agent is online (e.g., “I’m available now”). - Agent Offline Text
Customize the text shown when the agent is offline (e.g., “I’ll be back tomorrow”).
👉 You can add as many agents as needed by clicking Add New under the Chat Agents section.
Pre-filled Message Variables #
When setting up Pre-filled Messages, you can use dynamic variables to automatically insert information such as site details, product data, or user context. This makes messages more personalized and relevant without requiring manual input.
Global Variables #
{siteTitle}→ Inserts your website’s title.{siteEmail}→ Inserts the site admin email address.{currentURL}→ Inserts the current page URL.{currentTitle}→ Inserts the current page/post title.{siteURL}→ Inserts your website’s URL.{ip}→ Inserts the visitor’s IP address.{date}→ Inserts the current date.
WooCommerce Variables (when used on product pages) #
{productName}→ Inserts the product’s name.{productSlug}→ Inserts the product slug.{productSku}→ Inserts the product SKU.{productPrice}→ Inserts the product price.{productRegularPrice}→ Inserts the regular (non-sale) price.{productSalePrice}→ Inserts the sale price (if available).{productStockStatus}→ Inserts the stock status (e.g., In stock / Out of stock).
Conditional Blocks #
Use conditional blocks to show/hide certain parts of your message:
{PRODUCT_START} ... {PRODUCT_END}→ Content shown only on product pages.{NOT_PRODUCT_START} ... {NOT_PRODUCT_END}→ Content shown only outside product pages.{LOGGEDIN_START} ... {LOGGEDIN_END}→ Content shown only if the user is logged in.{NOT_LOGGEDIN_START} ... {NOT_LOGGEDIN_END}→ Content shown only if the user is not logged in.
Example #
Hello! I’d like to ask about {productName}.
Price: {productPrice} (Regular: {productRegularPrice}, Sale: {productSalePrice})
{PRODUCT_START}Stock Status: {productStockStatus}{PRODUCT_END}
Website: {siteTitle} - {currentURL}
👉 This ensures each WhatsApp chat starts with useful, contextual details, saving your users time and giving agents all the information they need upfront.


